The Leica M cameras are unlike anything else out there, so if you just got one and struggling to make it work, here’s how to use a Leica M camera.
Hi my name is Sven the Leicaphile and in this article I will break down into simple steps how to use a Leica M camera. This is very exciting as shooting an M is unlike anything else out there and by the end of this tutorial you will know how to shoot like a pro.
Before getting into the How to use a Leica M camera beginner’s tutorial, it might be good to grab your manual. If you don’t have it you might find it here.
Introduction
If you shot any camera before and all you did was point and shoot, the camera did most of the work for you. If you remove some of the automation, what needs to be done then goes on your shoulders. Imagine driving and automatic car, you don’t think about the shift speed, but if you go to a manual transmission car the car’s speed suddenly falls on you.
Leicas are like manual transmission cars because they are designed to be shot on manual. Only since the M7 was there some form of auto shutter speed, but most photographers enjoy theirs on manual completely.
So what’s on you then when it comes to a Leica M? Manual focus, manual aperture, manual shutter speed and manual ISO. This is quite daunting if all you shot before was automatic cameras!
So let’s begin our how to use a Leica M camera tutorial by starting simple and then building upon it.
How to use a Leica M camera tutorial
1. The basics of exposure
Like I said above, automatic cameras did everything. But once you are on the driver’s seat you are the one that manage the settings. Here’s the thing: Whatever setting you change will affect the image.
That is why we need to start this how to use a Leica M camera tutorial with an understanding of exposure. The camera is like a glass bottle that needs to be filled with water. Once you press the shutter release button the glass bottle gets filled and you have your exposure.
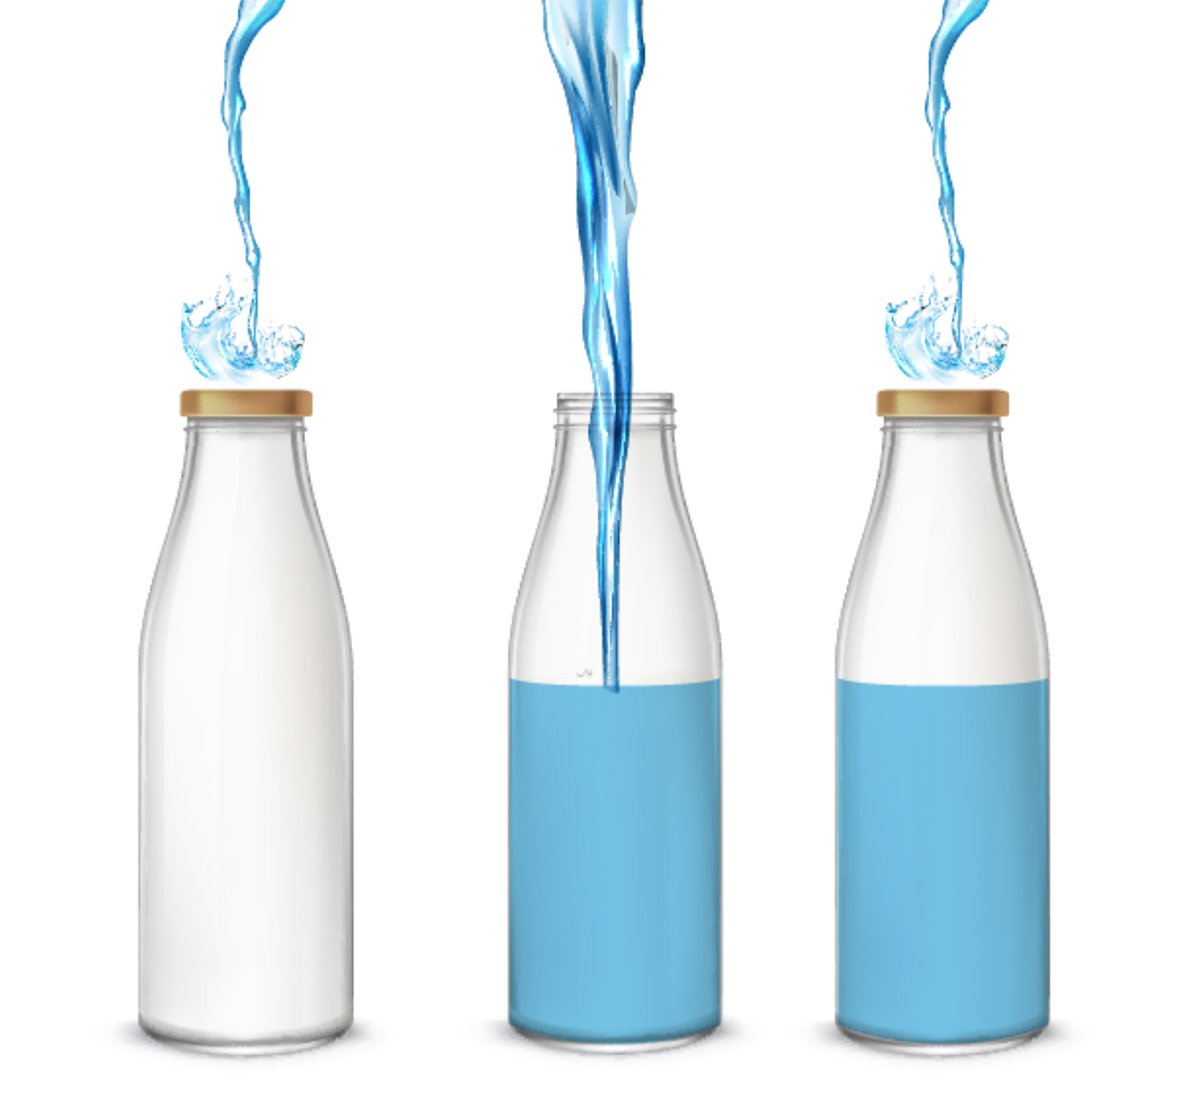
If you look at the illustration above, when you open the bottle, water gets in, and then you close it. For photography the principle is really the same, simply replace water with light. Way yonder when everything was done manually, in order to make a photo, the photographer would take the lid off the front of the lens, count for a few seconds and then put the lid back. This is really like the glass bottle analogy but he’s filling his camera with light.
Now here’s the thing: There’s plenty of ways to fill your glass bottle. Imagine there’s a something at the opening of the bottle that allows me to close or open the hole to control the flow. You could either have a small hole or a big hole. That is your APERTURE. If you have a small hole, and you open it, do you need more or less time for the glass bottle to be filled? Yep you need MORE time because the hole is small.
If the hole is large, you will need less time for the glass bottle to be filled. The time you leave the closed hole open for is called SHUTTER speed.
Here’s a last point. You could potentially simply change the glass bottles. You could use a smaller glass bottle vs a larger one. If you have a larger glass bottle, well you will need MORE time with the water flowing to fill it up vs a smaller glass bottle.
The size of your glass bottle is your ISO. If your ISO is low, you need more time to fill the glass bottle. If your ISO is high, you need less time. Why not shoot at high ISOs then? Well it is because increasing your ISO sensitivity degrades the image, and at very high ISOs you have a grainy mess.
Without getting too deep, your goal is to simply fill the glass bottles by either changing the glass bottle size, the size of the whole the water goes trough or the time the opening stays open. In camera terms you need to make your exposure by changing your ISO, APERTURE and SHUTTER SPEED.
Now comes the slightly more complicated part. If you change one setting, you need to compensate for the other.
Let’s say I needed my glass bottles filled. Both are the same size. I could either open the hole small for 10 minutes. Or I could either open the hole big for 5 minutes. Both would accomplish the same thing.
Here’s the question…why fiddle with settings? Well because of what you want to do:
| Setting | Example | Effect |
|---|---|---|
| High apertures | f1.8 | Thin depth of field (Blurry background) |
| Small apertures | f.22 | Large depth of field (Sharp background) |
| Fast shutter speed | 1/500th | Freeze action |
| Slow shutter speed | 0.5 secs | Blurry action |
| Small ISO | ISO 100 | Clean image (Needs more time) |
| High ISO | ISO 6400 | Grainy image (Needs less time) |
The higher the ISO the less time you need open to make an exposure but the image quality suffers. But sometimes, like at night, you are forced to use it because your shutter speed is so slow that you can’t hold the camera straight and your images become blurry.
Also, this will take some getting used to, but a LARGE aperture (Big opening) has the small number like f1.8. And the SMALL aperture (Small opening) has the small number like f22. Confusing? Yes. But you’ll get used to it.
2. The Leica M map of control
Next in our How to use a Leica M camera tutorial is finding those settings on our M. So where does these go on your Leica? Here:
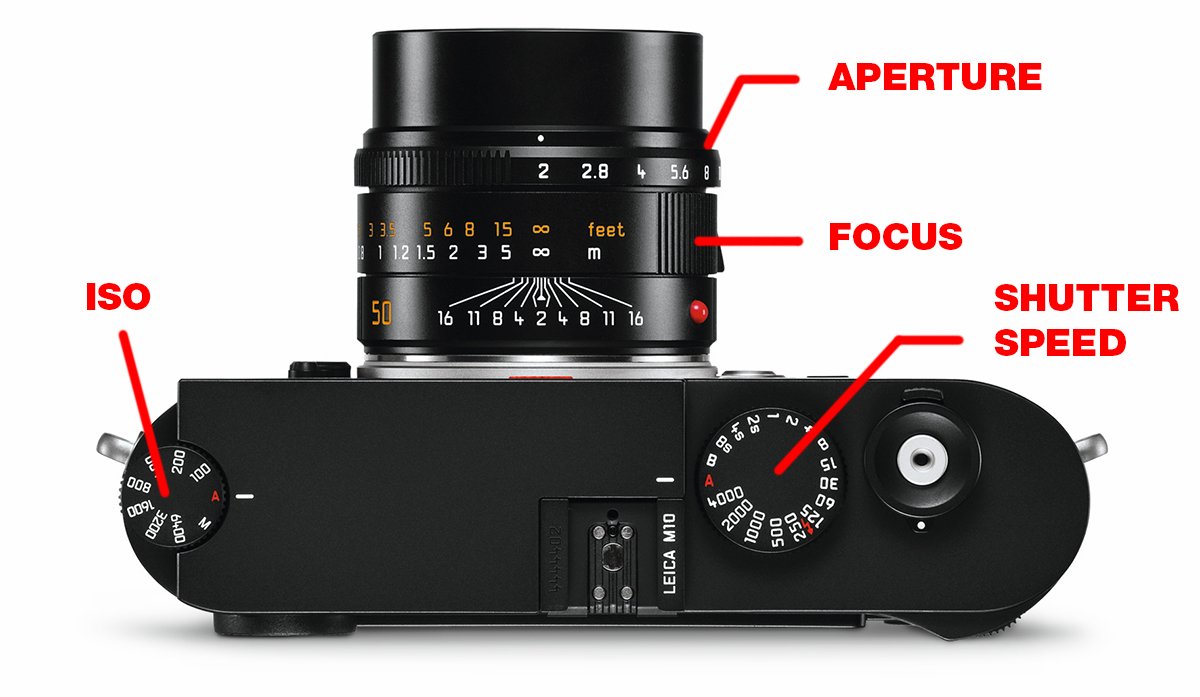
There’s your aperture that you change on the lens directly. Go ahead and do this and notice how the blades open or close as you do so. There’s the shutter speed dial on top and finally your ISO dial on the left. All of this is assuming the Leica M10, if you have another older one then your ISO needs to be changed in the menus.
2. Start with these settings
Now that we’ve got this out of the way, let’s get into how to use a Leica M camera. The worse thing to do as a beginner is to put everything on manual, there’s just too many things to manage! So the first step on how to use a Leica M camera is to put everything on AUTO.
Put ISO on auto (A on the dial) and shutter speed on auto (A on the dial). Now there’s only two things to manage: Focus and aperture. Leica lenses have been manual and the principles behind the focusing mechanism have been the same since the first Leica M3.
3. The trick to focusing
Next up our How to use a Leica M camera tutorial is focusing. This is probably what trips most beginners. They look at the viewfinder, it looks normal, shoot, and then realize it’s blurry! Well, Leicas are rangefinders so they work a bit differently.
The early cameras were view cameras, those big ones with a cloth on them. You could see exactly what was going on, frame and focus, and then put in a plate in there, and then shoot. You see first and then add your photographic plate.
That is not possible on a small camera because you need to manually change the plates for every shot. The small cameras like Leicas had film in it and no way of seeing what the lens sees.
Eventually SLRs would be invented where there’s a mirror that takes what the lens sees and pushes it to the viewfinder. That is why with SLRs you can see all of the image blurry and gradully gets unblurred when you focus. But before that was the rangefinders.
The thing is this: With any Leica M camera (except if you use an electronic viewfinder / live view) you CANNOT see exactly what the lens sees.
How do you know what’s in focus then? With the rangefinder patch.
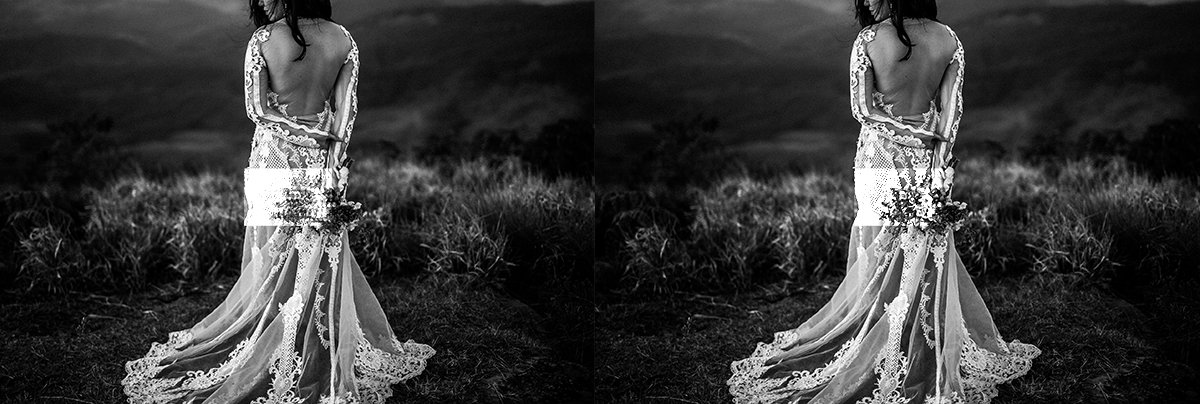
When you look in a Leica M viewfinder, what you see passes trough, so it’s almost like looking at a (magnified) window. The way to find your focus is in the middle patch.
If you blink your right eye and then your left eye, you can see that each are slightly off and opening them together gives you a more accurate picture of reality. This is the same for the patch, once you align the patch together and the image is one do you have your focus. You can see the RF window below and how far it is from the viewfinder, it’s really like human vision.
You focus by twisting your lens right and left. If you look in front of your camera the focus button is only there if you use live-view / viewfinder so that you have things like focus peaking.
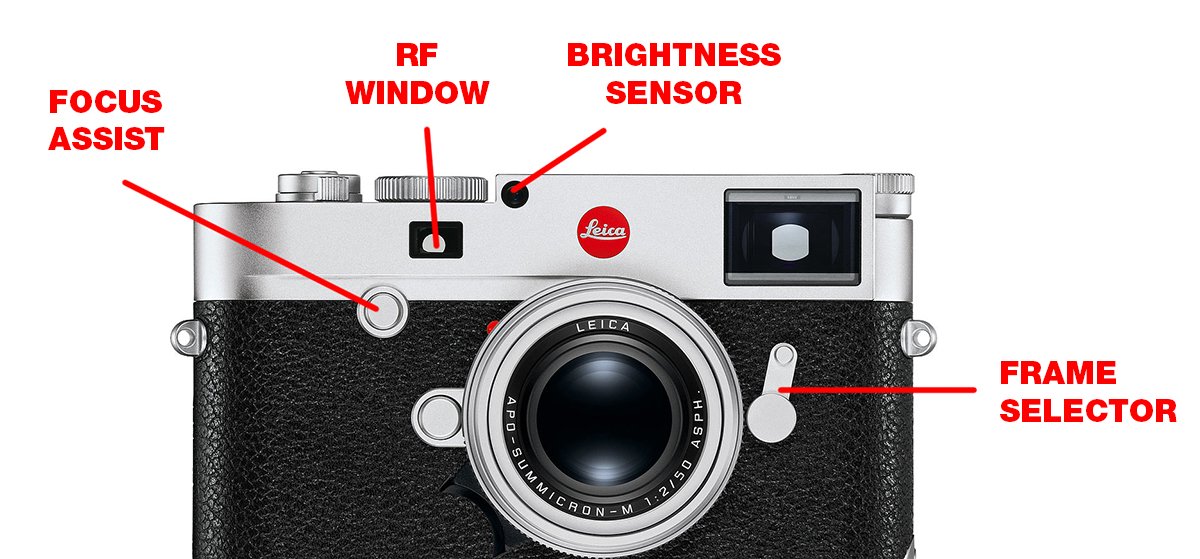
The best thing to do is to look for a definite corner like the side of someone’s head, focus and then reframe as you want.
Many photographers for more extended periods of shooting pre-focus their lenses instead. So they put in smaller apertures so that the area in focus is big, and simply walk and shoot without having to worry about focusing.
You are not done however, what is your image going to look like? Again this is where SLRs win in terms of ease of use. You see what the lens sees so if it’s blurry, you see it, and the frame is pretty much what you see is what you get.
But since rangefinders can’t see what the lens sees, they use framelines. So using a wide angle vs a telephoto on a Leica M camera will NOT change anything on the viewfinder! What will change is the frame lines.
If the frame lines don’t change you need to do so manually with the frame selector to the right of the lens. Frame lines usually comes in pairs so you have for example both 28mm & 90mm on one frame. Here’s an illustration
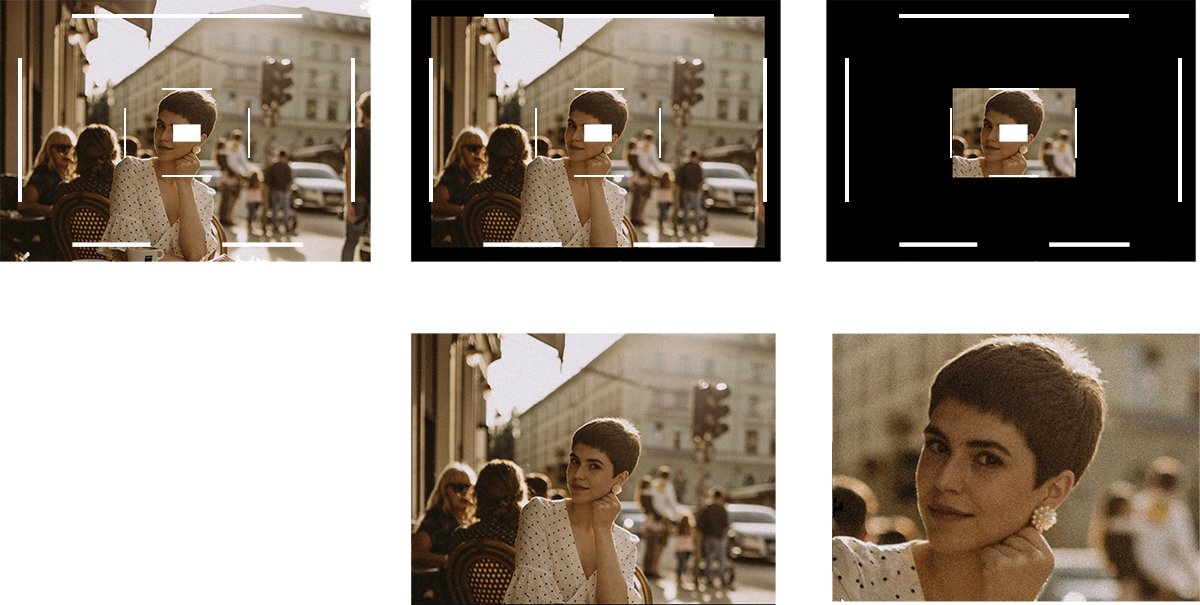
On the top left is what you see in the viewfinder. The larger frameline is 28mm and the inner frameline is 90mm. When you shoot you have to have the discipline to mentally “black out” what is not in your frame like on top.
Once you shoot you can see the results of your framing at the bottom.
4. Aperture changes
This is the part of this how to use a Leica M camera tutorial where things REALLY start being fun! So now you know how to focus and find your frame, it is time to have creative control! Keeping your ISO and Shutter speed on Auto, take a subject and put your camera’s aperture on f16.
Look at the lens opening and make a mental note out of it and then shoot. Look at your picture. Now put your Leica M at maximum open aperture like f1.8 and shoot. Your subject’s background should be blurry now! Here’s an illustration:
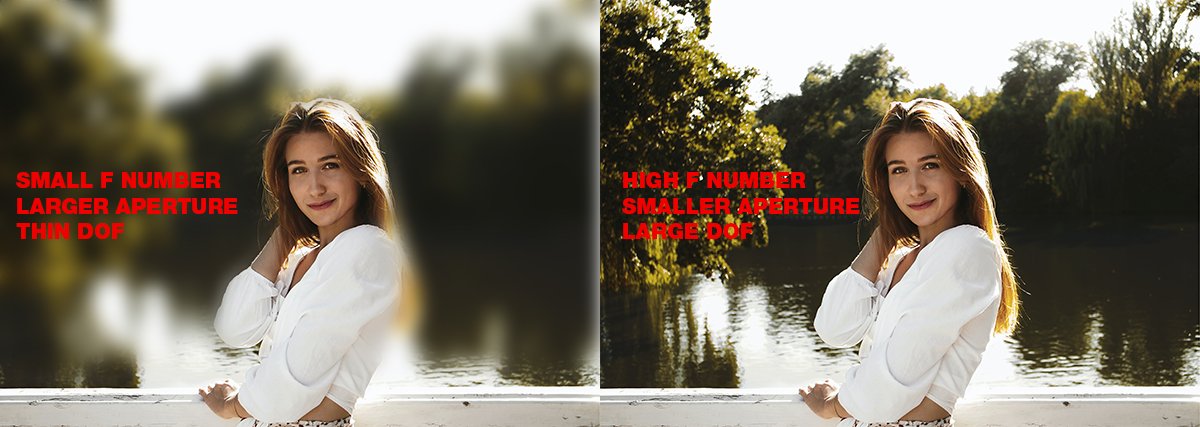
The blurry-ness was added by Photoshop to illustrate the effect. Here’s a shot at high aperture:
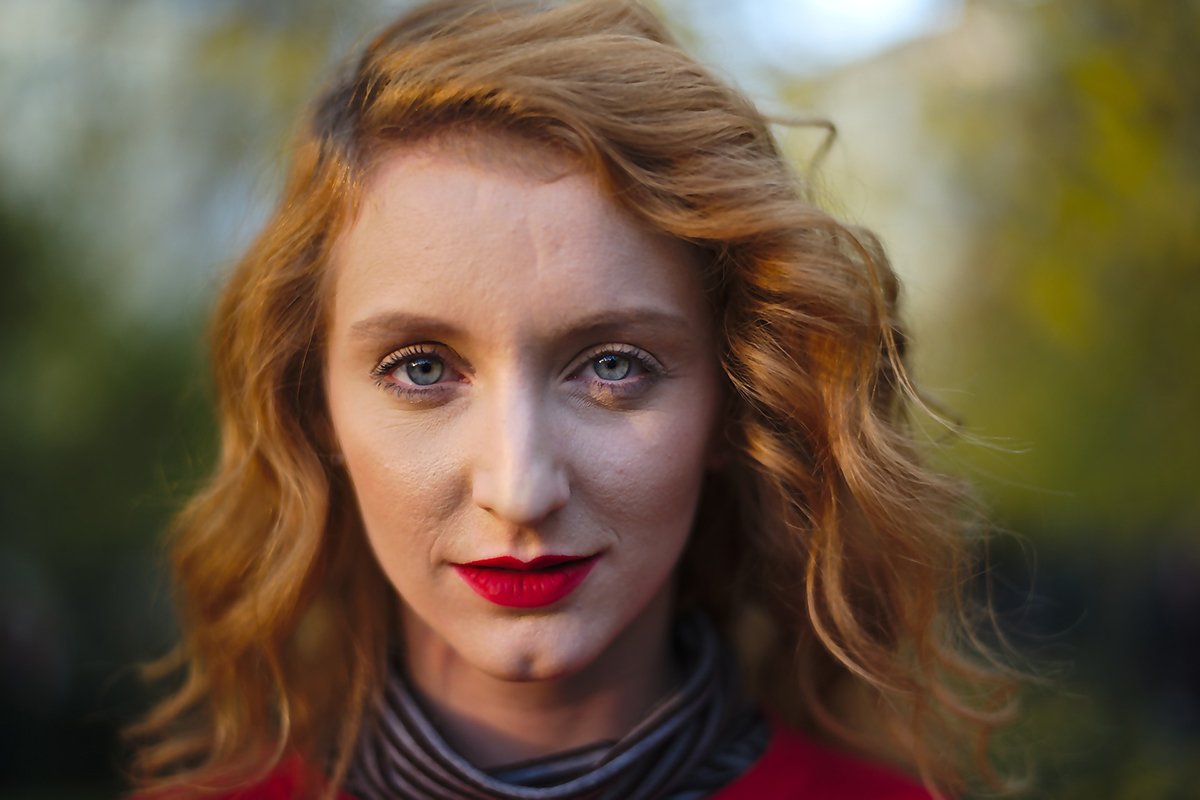
Remember that aperture deals with depth of field. When it’s high apertures like f1.8 then the depth of field is super thin and everything around gets blurred out. You also don’t need much time to “fill the glass bottle”. At lower apertures like f16, the aperture is closed and it needs more time and the depth of field is large, so not a lot of blur going on.
Go ahead and only deal with your aperture. Get used to shooting with the rangefinder and get used to your framing. Once you are done, come back and let’s go one step further in our How to use a Leica M camera tutorial.
5. Shutter speed madness
Good so far? Let’s advance in our How to use a Leica M camera tutorial. Remember that the more manual things on our hands, the more we have to manage. So far we have focusing, framing and aperture. Now it’s time to put shutter speed out of automatic.
Here’s what to know about shutter speed: High shutter speed FREEZES the action. So if you have a fountain of water, at high shutter speeds you will see the individual droplets.
Slow shutter speeds like f1/15th and below will let the action flow. So that water fountain will be a blur. Yes that is how landscape photographers do their dreamy landscapes with flowing water. Here’s an example:

One the left would be fast shutter speed (freezes action) vs the right where the action gets blurred. This was Photoshoped for clarity, here’s better examples of slow shutter speed:

But here’s a caveat: You can’t handhold more than about 1/30th of a second. You can do more with more modern cameras that have stabilization, but for Leicas the most you can hold it for is about half a second.
Because slower shutter speeds go both ways, yes it lets the action flow…but since the sensor is open you probably will shake the camera while trying to shoot.
The good news is, you usually don’t need to manage shutter speed that much, except if you want to do something creative like having people moving in your images. Jus make sure not to go below something like 1/30th or 1/125th if you are moving while shooting.
But we are not done. Remember that if you change one setting, the other has to change too! Up until now the camera was compensating for your changing of the aperture, so now YOU have to do it!
It goes like this:, the bigger the aperture (the lower the f number like f1.8), the FASTER shutter speed you can use because the opening of the lens is bigger.
The smaller the aperture (the higher the f number like f16) the SLOWER the shutter speed you will need because the opening of the lens is smaller.
Again, it is just like filling two glass bottles of water. If there’s only a small opening for the water to go trough it will need more time vs the same glass bottle size and a larger aperture.
Put your camera on a basic aperture. Say f5.6. Take a shot at shutter speed 1000, then 500, etc. By the way these are fractions. So 1/1000th of a second, 1/500th of a second, etc. And simply look at your images, you will see that your image was dark and then gradually becomes lighter and lighter and then so light as to be white.
This is because you are putting in not enough water, adequate water to too much water in your glass bottle. So when you shoot, you will want to think about what focus do I need? Put your aperture at the appropriate number you want and then twist and turn your ISO dial until you have an adequate picture.
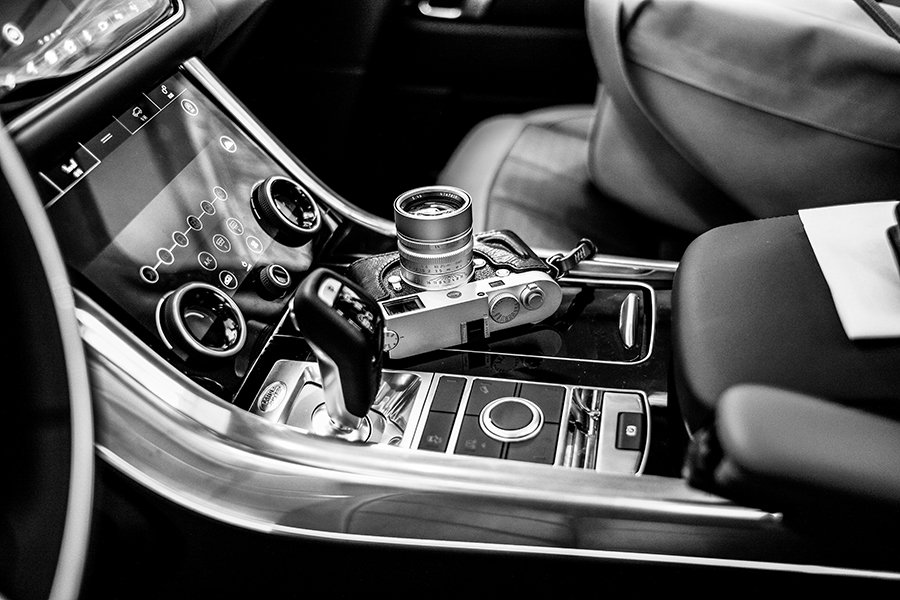
If you change your aperture, you will have to compensate with the shutter speed.
6. The final piece
This is the final piece of the puzzle in this how to use a Leica M camera tutorial. We have focusing, framing, aperture, shutter speed now we only need ISO.
ISO is last because this is usually the last thing you want to change. Lower ISOs give you a cleaner image while at higher ISOs things start getting grainy and image quality suffers. See a Photoshop simulation of this here:
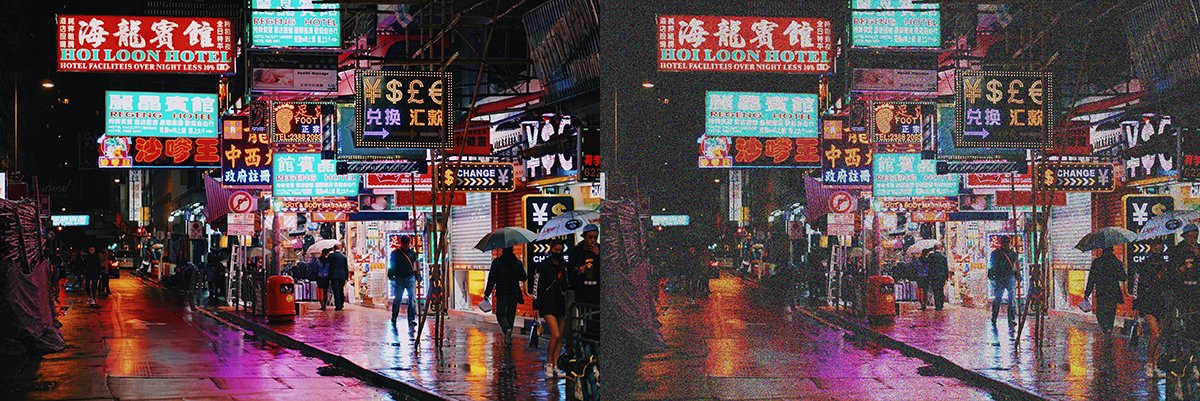
By the way, the bigger the sensor, the better the ISO generally. Anyway, back to our onions: You usually want to keep your ISOs low and only go up when you need to. This is usually never a problem when it’s bright outside, but what if you are somewhere at night?
Consider that you have your aperture maxed out at f1.8. And you are somewhere SO dark that only 1 second of exposure would give you a normal picture. Of course you can’t hold the camera that long to make a sharp photograph so that’s when ISO comes to the rescue.
From ISO100, you twist it all the way to ISO3200. Without getting too technical this gives you “credits” to use, aka “Stops of light”. If you have ever played video games where you can create your own character but the character has a limited amount of credits, so you could use your 100 credits to give them 100 strength, but 0 wisdom, 0 stamina, or you could use your 100 credits for 50 strenght, 50 wisdom, 0 stamina, etc.
There’s 5 clicks, or 5 stops of light between ISO 100 to ISO1600, so you have 5 “credits” to use either on your aperture or shutter speed. Either you can close the aperture 5 clicks or the shutter speed 5 clicks. Or Aperture 2 clicks and shutter speed 3 clicks.
In our case, let’s say that we want the thin depth of field to do a blurry background shot. So we keep our aperture as-is at f1.8 and click 5 times the shutter speed dial.
So from the 1 second shutter speed, we click 5 times and now we are 1/30th of a second, perfectly hand-holdable.
Both images would be the same exposure, but the first one would be blurry because the shutter speed was too slow, the second one would be sharp because the shutter speed would be adequate to handhold. The second one would have more grain too because that’s the tradeoff of higher ISOs.
6. Finding your exposure
Almost done with this How to use a Leica M camera tutorial! Let’s get back to our glass bottle analogy, so far I’ve only talked about YOU being in control of the glass bottle. There’s also another part to this: how much available light there is.
For example, if I had two glass bottle that are the same with same aperture and going to open them for the same amount of time, which do you think would fill up faster: If I picked up water from a little stream or if I put in in Niagara falls?

What you do with your glass bottle needs to be in response to the situation you are in. So being in a sunny beach will require different settings to correctly expose vs somewhere at night because the light is not the same.
If you remember the exercise about changing shutter speeds one by one, if only there was a way to know what exposure I needed without having to do this, right? There is.
Way back then people had to guess how much shutter speed and aperture they needed (ISO was fixed with film) and then came the light meter that you could hold up and would tell you what settings you needed. Of course Leicas now have light meters that tell you how much exposure you need for an image to be correctly exposed.
You can overexpose and let in too much light, your image will be washed out in white. Or you can underexpose and not let in enough light, your image will be too dark.
If you look at your viewfinder, here’s what these dots and all mean:
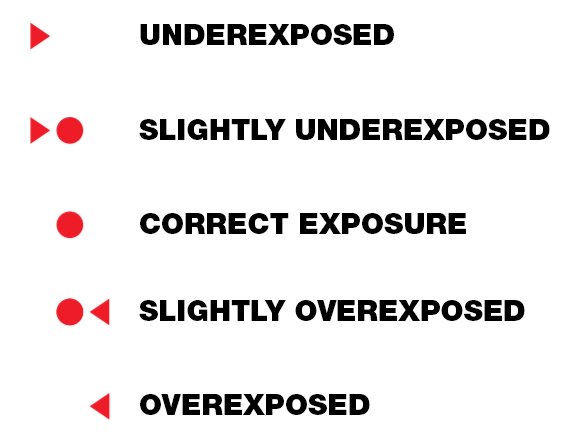
The dot is what the camera thinks is the correct exposure. If you see a triangle to the right that means you will let in too much light. A left triangle means not enough. Without getting too technical, whether you are WAY off or at least 1 stop off, only the triangle will appear.
The shutter speed dial is pretty much the same direction. So if you are underexposed, you need to twist the dial to the right, it will let in more light with a slower shutter speed.
7. Bringing this together step by step
There’s certain steps that are out of order in this how to use a Leica M camera tutorial, but it is because I have to mix in photography theory and using a Leica M. Once you get everything I’ve said above, here’s the actually step-by-step steps that need to happen:
| Step | What | How to |
|---|---|---|
| 1 | Make sure you have your framelines correct | Little lever on the right of the lens. Need to do this every lens change. |
| 2 | Look for your picture | Determine your aperture, ex blurry background or not |
| 3 | Put in your aperture | Say f1.8 for blurry background |
| 4 | Look in viewfinder to check your exposure | Twist the shutter speed right and left until small dot |
| 5 | If needed adjust ISO | The higher the ISO the lower the image quality |
| 6 | Focus | Align the rangefinder patches |
| 7 | Frame | Take a note of your frameline |
| 8 | Shoot | Press the shutter release button |
And that’s it. I know this might look complicated but once you get the hang of it, it is simple.
Overwhelmed? Read this
Consider this the “self-help” part of the How to use a Leica M camera tutorial. If you are in arms because this is complicated, consider this. The only reason why this is complicated is because you are trying to shove this down your subconscious. Everything is easy once the subconscious makes it automatic.
How hard was it learning to drive a car? Impossibly complicated. You had to deal with looking in front, keeping your driving speed, remembering what pedal does what and you had to remember to look at the mirrors, etc.
Super complicated. And how about now? Second nature. This is only complicated because you are starting, but once you practice and get it in the subconscious part of you it will be easy and you will probably never want to go back.
The simplicity that the Leica M cameras offer are the very reason why photographers flock to them.

Conclusion
I hope you have enjoyed this tutorial about how to use a Leica M camera. It’s pretty complicated at first but once you get the hang of it it will become part of you and you will be able to shoot like a pro without any issues.
Again that overwhelm feeling is natural and part of the process, it is because your brain is learning and trying hard. So keep at it and shoot your Leica, give yourself room to fail and you’ll be using it like a pro in no time.